Saturday, April 30, 2016

UFO out of the bag and on the WALL!!

This is what happens when a project sits in a bag, pinned to a piece of flannel for almost two years.  In the Spring of 2014, Jacquie Gering came to the London Friendship Quilter's guild as our speaker and workshop leader.  I went to the Stitch and Flip workshop and came home full of enthusiasm for my new project!  I had pinned all of the squares to the flannel design wall and carefully rolled it up so I would not lose any pieces or where they were supposed to go in the quilt.

 This week, after careful aging (LOL) of this project,  I laid the flannel out on the floor outside my sewing room and carefully took two squares off at a time to press them and place them on my design wall. There were a lot of squares on my piece of flannel so this took most of one evening!


I cut out some more squares for the background (they are 3.5" squares, in case you were wondering)


Before I added the background squares, this is how it looked.

When Christine was here this past week for our sewing night, I added leaves to the stems and stems to the purple flowers. I also made one more purple flower.


My garden needed some butterflies!  This is how my design wall looks now.  I am ready to sew all of the squares together. It will be challenging to keep everything going the right way and in the right order.  I will keep my seam ripper close by,  just in case.
 
Speaking of gardens, I have a few flowers growing in mine...
 
 
Rhododendrons.
 
 
These are the buds for the yellow flowers on my Oregon Grape Holly bush.


I will post a picture when my quilted garden is put together!

Saturday, April 23, 2016

Modern Quilt Guild Retreat Wrap-Up.


The South Western Ontario Modern Quilters' retreat was a couple of weeks ago.  I have not had time to do a second blogpost about it until now...  Before the retreat, we were each paired with another person who would be attending so we could make and exchange lanyards.  My swap partner was Kathleen from Toronto.  She made me the beautiful lanyard in the picture above from a piece of Liberty fabric--the colours reminded her of Spring.  She also sent me a wonderful bar of chocolate which I shared with my husband.

I made her lanyard out of some black and white fabrics and a few solids that are in the London Modern Quilt Guild Logo.  We all wore our lanyards at the retreat with our nametags attached to the clasp.

 The weather was rather chilly the weekend of the retreat and the water in the bubbling rock fountain at the Elmhurst Inn was partly frozen in little balls of ice around the perimeter of the fountain.

I had to take the opportunity to take a few pictures. I managed to do this without falling on the slippery rocks around the fountain.


I showed the first project I worked on at the retreat in this blogpost...the pillow that became a wall hanging.

Next, I worked on some liberated stars which I will use to make some placemats for the winter season next year.   I have always wanted to make new placemats but just never seem to get around to working on them.  This year, I purchased some red patterned fabric at one of our guild meetings and I have been collecting some gray and white prints to go with it to make the placemats.


This one finishes at 3" square.  I made several star blocks in various sizes.

(oops--the picture is upside-down!)

This one is under construction.


Here is a picture of all of the stars that I made at the retreat. 

I need to make at least a dozen placemats to have enough for family gatherings so I still have more stars to make.   Each placemat will be different but will have the same red and white striped binding.  This past week, I finished off the 2nd half of my daughter's quilt so I hope to get back to making more stars soon. (after sewing the two halves together!)

We had lots of door prizes donated by various quilt stores and manufacturers and I won this bag which included batting, a magazine, some fabric, sewing machine needles and a gift certificate as well as a new seam ripper.  We all had a great weekend of sewing, eating and making new friends and I look forward to next year's retreat! 

Sunday, April 17, 2016

Quilty Inspiration

This is the Fisher Building in Detroit, MI.  On Saturday, my husband and I had a date day in Detroit and took in two Pure Detroit architectural walking tours.  (The Guardian Building and the Fisher Building)  Our guide at the Fisher Building was a history student at Wayne State University.  He really knew his stuff and really made the story of this building come alive for all of us on the tour.  No expense was spared when this building was constructed in the late 20's.  You can read more about the Fisher Building here.

I took lots of pictures on the tour but I think that the ones that will interest my readers the most are the ones I took of the floors.


So much quilty inspiration right under our feet! 

What a great way to sash your next quilting project!!!

The love the triangles in this hexagon pattern.

How about some economy blocks?

Or some hour glass blocks?  The floors were made from several different types of marble. The craftspeople who laid these floors did a fantastic job!


After looking at the floors (and other aspects of the building) on the main floor, we got into the elevator and went up to the third floor.  I looked down and this is what I saw on the elevator floor.


From the 3rd floor, we looked down and saw the floors from above.

WOW!

I don't think I could ever make this type of medallion quilt!  The brass part was roped off so people don't walk on it.  It has had over 90 years of people stepping on it and the pictures in the brass are not as sharp as when it was installed.  Here is a close up of the inner border:


This is the railing on the third floor.  They don't make buildings like this anymore.

 
When we were done the tour, I stepped into the ladies room and found this on the floor!
I have never seen a bathroom floor like this before!

If you find yourself in Detroit, you really should try to go on the Pure Detroit tours.  There was no charge for the tours we took.  The link to their website is near the top of this post.  I am not receiving any money for the promotion of the tours.  I just thought you would like to see the quilty inspiration in the Fisher Building in Detroit.

Friday, April 15, 2016

A Change in Plans

Christine and I spent last weekend at the South Western Ontario Modern Quilt Guild retreat in Ingersol, Ontario. There were over 20 quilters at the retreat and it was great fun to meet everyone and drool over their projects!!!  As is usually the case, I brought way more fabric than I could use and more projects than I could ever do in one weekend.  I like to keep my options open...LOL!

Those of you who read my blog on a regular basis will know that I have been working on a paper pieced pillow for  a few weeks now.  The pattern is from this book by Jen Kingwell.


 This is a picture of the pillow from the book.  She used scraps to piece her arcs and then added scrappy sashings. 


Before the retreat, I had all of the arcs completed and the other pieces cut out.  One block was completed and three others had the quarter squares added--they are hand sewn as the curve was too tight to sew consistently on my sewing machine. I spent several hours completing the blocks and then I had to decide how to arrange them for my pillow.


My first attempt was just a random placement of the coloured arcs.  I liked the idea of a circle in the middle.  Did I want sashing?  cornerstones?

I rearranged the arcs into colour groupings...I liked this arrangement.  I consulted with other quilters...we thought a coloured square in the middle of each grouping would look good. Would you believe that in my whole suitcase of fabric, I did not have a red scrap that would work for the upper right block???  Luckily, a few other people had some fabric with them....Karen donated a 1.5" square to my quilt and I set to getting the blocks put together.

After putting the blocks together, I quickly realized that this pillow was going to be too big for where I intended to put it, BUT it was the perfect size for a wall hanging!  I added some borders and voila!--it is ready for quilting.  I will be quilting this on my DSM with my walking foot.  I need to let the quilting ideas percolate for a few days first...

I will be blogging about the retreat again...stay tuned.

I will be linking up to Kathy's Slow Sunday stitching and Finish it up Friday.

Wednesday, April 13, 2016

Walking Foot Quilting Class with Jacquie Gering

This past Thursday and Friday, Christine and I spent two days with Jacquie Gering in St. Mary's, Ontario taking a class on quilting with your walking foot. WOW!!!  We had a wonderful time!!  and we learned lots of new ideas for quilting our own quilts on our domestic machines.  We had to prepare 10 quilt sandwiches before class.  I hand basted mine but most people used spray baste.

We started by talking about straight line quilting.  My sewing machine walking foot is 3/8" from needle to the edge of the foot.  Other walking feet were 1/2".  Jacquie explained how to keep the lines straight by adding painters tape to our projects and using a ruler to measure how far to the tape at the top, middle and bottom of the project. 


These lines were 3/8" apart.  I then subdivided them...


And then again... (but I did not take a picture!)  This is called matchstick quilting and can add wonderful texture to a project.   Jacquie showed us her notebook cover below as a great example of matchstick quilting.  A friend made this cover for her. 


Next, we did some gently curved lines. I used a hera marker to make the first line and then used the edge of my walking foot to sew each line.


We had time after each lesson to try out each type of quilting pattern.


Since everyone was getting quite comfortable with curves, we did some organic quilting next.  I have done lots of this type of quilting in the past.  Jacquie encouraged us to let some of the lines cross to make them look like ribbons. The possibilities are endless!


Spiral quilting was up next...I had already done this on a quilt I showed in my last post, so I spent my practice time learning how to spiral into the centre of the circle.  I made two attempts at this and the second was much better than the first...I think I need to practice more before doing this on a real quilt.  Again, no pictures...sorry.
 
Jacquie showed us a sample "book" she made of all of the fancy stitches on her sewing machine, sewn at different stitch lengths and widths.  She has a notebook with all the information about each stitch and uses her sample stitches to pick quilting stitches for her quilts.  These stitches can add wonderful texture to a project.


I used one of my quilt sandwiches to try out some stitches on my machine.   I have actually quilted a table topper with fancy stitches before.
 
I labelled my stitches right on my sample.
 
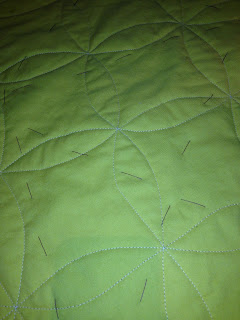
This is called Orange Peel quilting--we had to draw a grid on our fabric and then sew curved lines between the intersections.  Jacquie showed us lots of examples of all of the quilting stitches on her own quilts as well as lots of variations for each of the stitches. 
 
 
I would like to bottle some of Jacquie's energy and ideas!  It was a wonderful two days and I can't wait to try out some of the ideas we discussed and practiced on my own quilts!
 
 
Thanks, Jacquie!!!