Since my design wall was installed last week, I have been puttering in my sewing room on various projects. I made a second house block using my 30's prints. They look like good neighbours!
I also made some more mug blocks. We will call this picture a "mug shot"... The darker blue one on the left side may be too dark for this little quilt so it may become a mug rug.
The colours for this month's block for the Elgin Piecemaker's charity quilt are rust, brown and cream. I designed this block myself...no pattern used.
I also made a low volume rail fence background for my modern wedge quilt. This is one block of 12. I figured I used almost two yards of fabric for this project...funny how the bin of low volume fabrics still looks just as full.
I have been playing with how to arrange the wedges on the background...this is why I wanted a design wall before completing this project. I have not made a final decision yet and would welcome any comments you have about the layout of the quilt...
I am not sure I have found the right layout yet...
Have a good week!
Showing posts with label mugs. Show all posts
Monday, February 8, 2016
Tuesday, February 2, 2016
My New Design Wall
I have wanted a design wall for a long time...probably forever!!! Since setting up my new sewing room last Summer, I have been contemplating which wall I would use as a design wall. I finally made a decision and my husband went out a couple of weeks ago and purchased some rigid foam insulation. Then, this past weekend, we bought the rest of the supplies...duct tape and command strips. I ordered the flannel design wall fabric (gray with a grid on it--designed by Kaffe Fasset) from Hyggeligt (there is a link in my sidebar) in St. Mary's, Ontario. The fabric got washed, dried and ironed on the weekend so we were all ready to work on assembly by Sunday night. We actually worked on this for two evenings--Sunday and Monday.
First, we measured the height of the wall--in my case--81" from the top of the baseboard to the ceiling. I used a utility knife and a drywall T ruler to cut the insulation to the right height. I used 4 two feet wide pieces of 1" thick insulation.
We used duct tape to put two boards together to make two 4' wide sections. We taped the seam on both sides of the board.
I had to sew a seam down the middle of the fabric and then cut it into two sections--one for each section of the design wall. There was 2-3 inches of fabric to wrap around to the back of the insulation on all sides. We used duct tape to tape the fabric to the board. We taped the bottom first and then stretched it and taped the top followed by the sides. We tried to keep the lines on the grid straight on the sides and top of the design wall as we taped it.
You can see the seam in the middle of the design wall. This is the first finished section before we hung it on the wall.
We had to cut a hole in the second section for an electrical outlet. We cut the hole before taping the fabric to the insulation. I cut an "X" in the fabric where the hole was and used duct tape to tape each part of the X to the back of the hole.
We hung the section with the hole in it first to make sure everything lined up properly. The bottom edge of the design wall rests on the top of the baseboard.
I did not want to use anything that would damage the wall. The hardware store had these nifty hook tape command strips by 3M --I purchased 4 packages.
It took me a while to figure out that I needed to take two strips and book them together like this to make this work for the design wall.
I scrunched them together and took the paper off one side so I could stick it to the back of the design wall.
There are four of these across the top and three across the middle and bottom of each section. We carefully leaned the bottom of the section along the top of the baseboard and once we were sure we had lined everything up properly, pressed it to the wall to get it to stick.
It worked! And, if I ever have to take the design wall down, there should not be any damage to the wall or the paint.
It did not take me long to start adding projects to the wall and put it to good use...
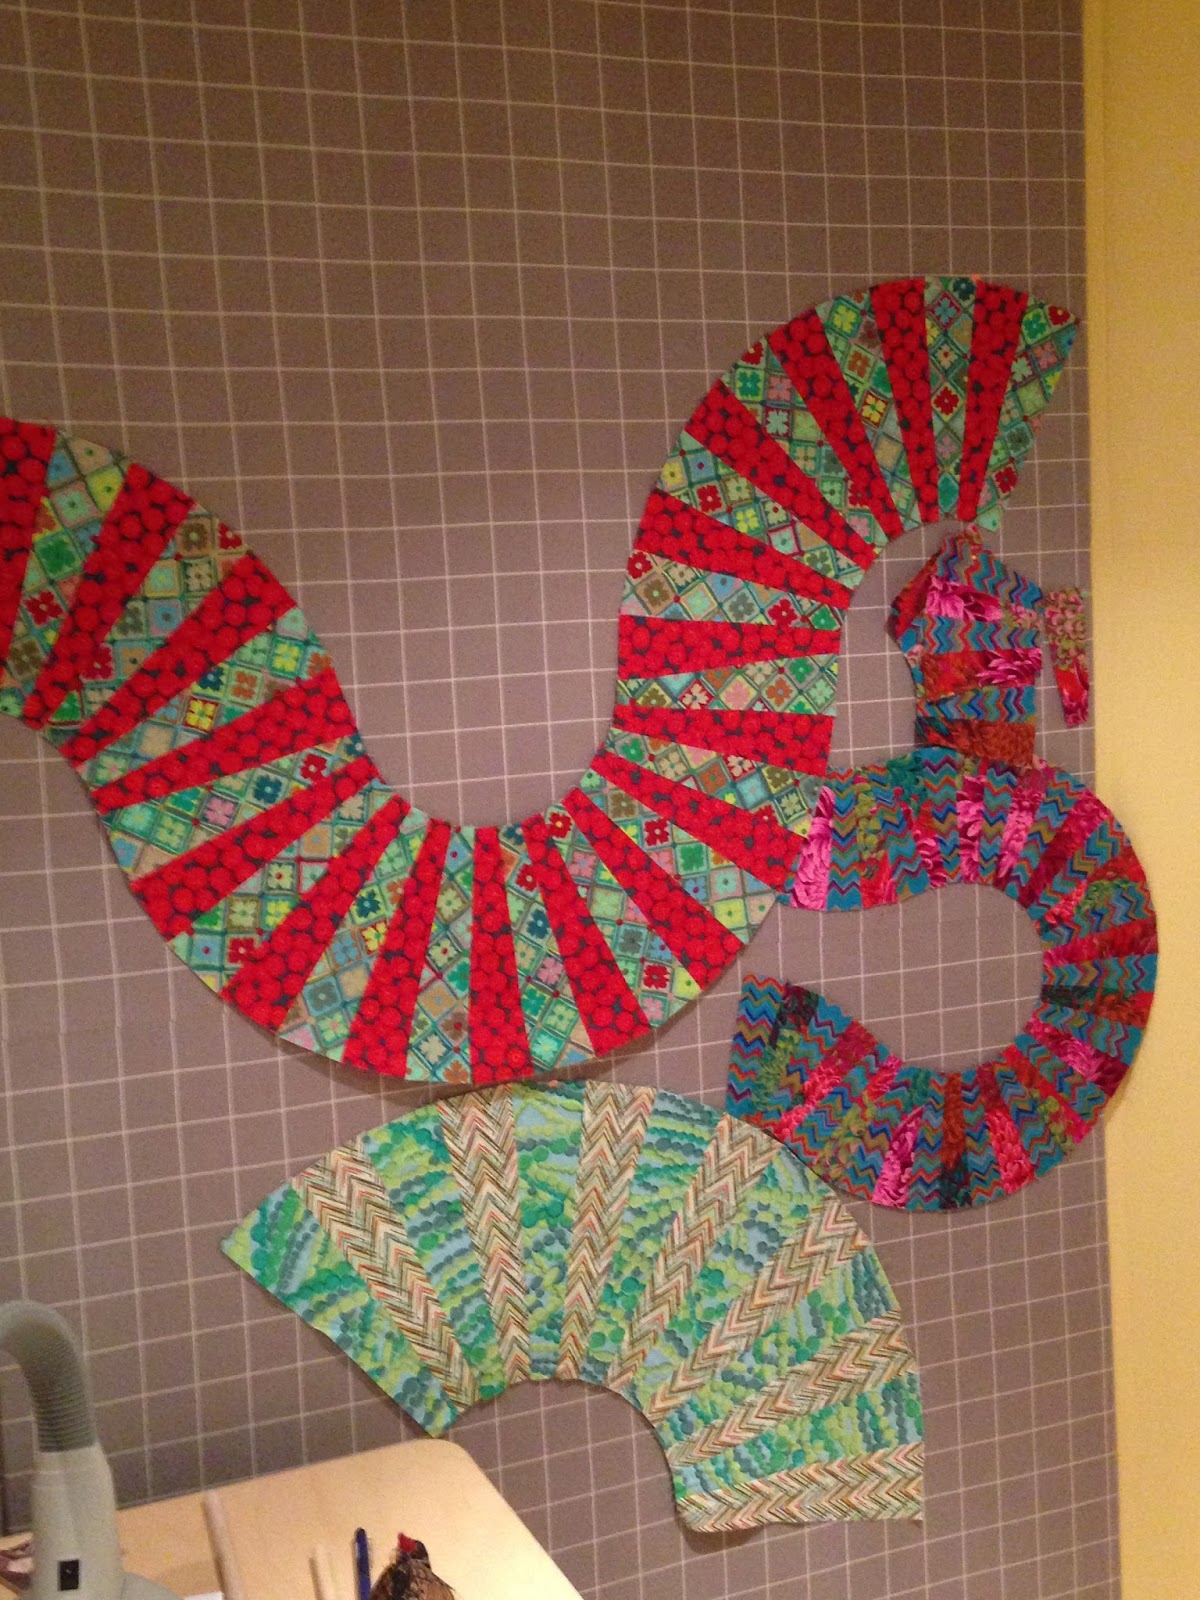
This project is from a workshop I did 2 or 3 years ago with Kathy Doughty (from Material Obsession in Australia). I need to rearrange the pieces and make a background. I want to get this UFO done but needed a design wall to get it all laid out. No excuses now for not getting it done!
I am just thrilled with my new design wall and can't wait to get sewing and add more blocks to the wall.
I also hung up my Mexican Stars quilt and a counted cross stitch picture I made years ago in my sewing room. I have a few more quilts to hang up in there too but they need hanging sleeves. I will post more pictures as I get them hung up.
Now...off to sew!!!
First, we measured the height of the wall--in my case--81" from the top of the baseboard to the ceiling. I used a utility knife and a drywall T ruler to cut the insulation to the right height. I used 4 two feet wide pieces of 1" thick insulation.
We used duct tape to put two boards together to make two 4' wide sections. We taped the seam on both sides of the board.
I had to sew a seam down the middle of the fabric and then cut it into two sections--one for each section of the design wall. There was 2-3 inches of fabric to wrap around to the back of the insulation on all sides. We used duct tape to tape the fabric to the board. We taped the bottom first and then stretched it and taped the top followed by the sides. We tried to keep the lines on the grid straight on the sides and top of the design wall as we taped it.
You can see the seam in the middle of the design wall. This is the first finished section before we hung it on the wall.
We had to cut a hole in the second section for an electrical outlet. We cut the hole before taping the fabric to the insulation. I cut an "X" in the fabric where the hole was and used duct tape to tape each part of the X to the back of the hole.
We hung the section with the hole in it first to make sure everything lined up properly. The bottom edge of the design wall rests on the top of the baseboard.
I did not want to use anything that would damage the wall. The hardware store had these nifty hook tape command strips by 3M --I purchased 4 packages.
It took me a while to figure out that I needed to take two strips and book them together like this to make this work for the design wall.
I scrunched them together and took the paper off one side so I could stick it to the back of the design wall.
There are four of these across the top and three across the middle and bottom of each section. We carefully leaned the bottom of the section along the top of the baseboard and once we were sure we had lined everything up properly, pressed it to the wall to get it to stick.
It worked! And, if I ever have to take the design wall down, there should not be any damage to the wall or the paint.
It did not take me long to start adding projects to the wall and put it to good use...
This project is from a workshop I did 2 or 3 years ago with Kathy Doughty (from Material Obsession in Australia). I need to rearrange the pieces and make a background. I want to get this UFO done but needed a design wall to get it all laid out. No excuses now for not getting it done!
I am just thrilled with my new design wall and can't wait to get sewing and add more blocks to the wall.
I also hung up my Mexican Stars quilt and a counted cross stitch picture I made years ago in my sewing room. I have a few more quilts to hang up in there too but they need hanging sleeves. I will post more pictures as I get them hung up.
Now...off to sew!!!
Wednesday, January 20, 2016
Tonight's Sewing Projects
Tonight was sewing with Christine night. She worked on a pieced flannel backing for a quilt that will be a gift for her Mom. She has been working on this for 3 sewing nights and tonight she finished it!!! Onward and upward!
I had a variety of projects to work on...
First, I added the final border to a quilt that will be donated to a Syrian Refugee family--this will be for the adults in the family. I used stash fabrics for the entire quilt except for the border--I had to buy fabric for the border.
This quilt will be quilted by Cathy at Eagle's Wings Quilts. Thanks, Cathy!!!
Next, I made two mug blocks to go with the one I made last week. I plan on making a couple of blocks a week until I have 25 so I can make a little wall hanging. They are 4" squares finished.
I made this one last week and the next two today.
The Elgin Piecemakers meet next week so I made my block for the monthly charity quilt project--the colours are navy, purple and turquoise. I have been in a liberated basket mood since my workshop last Saturday.
Next, I made a little house block. I am using my 30's prints for this project. This block and the mugs are made from patterns by Lori Holt. I hope to make a whole neighbourhood of houses and make them in to a wall hanging. Again, I hope to do a block a week. The house block can be made in a 4" or 8" size...I decided to make the 8" blocks.
Monday night, I finished quilting a child's quilt for a Syrian Refugee family. My friend, Jacqui, is putting the binding on this quilt. I made the quilt top a few years ago at a workshop and found it in my sewing room recently and decided to finish it off as a donation quilt. Here, you can see my organic quilting:
Here is the entire quilt (well...almost the entire quilt!), after trimming.
I hope to work on my liberated baskets quilt next week.
I had a variety of projects to work on...
First, I added the final border to a quilt that will be donated to a Syrian Refugee family--this will be for the adults in the family. I used stash fabrics for the entire quilt except for the border--I had to buy fabric for the border.
This quilt will be quilted by Cathy at Eagle's Wings Quilts. Thanks, Cathy!!!
Next, I made two mug blocks to go with the one I made last week. I plan on making a couple of blocks a week until I have 25 so I can make a little wall hanging. They are 4" squares finished.
I made this one last week and the next two today.
The Elgin Piecemakers meet next week so I made my block for the monthly charity quilt project--the colours are navy, purple and turquoise. I have been in a liberated basket mood since my workshop last Saturday.
Next, I made a little house block. I am using my 30's prints for this project. This block and the mugs are made from patterns by Lori Holt. I hope to make a whole neighbourhood of houses and make them in to a wall hanging. Again, I hope to do a block a week. The house block can be made in a 4" or 8" size...I decided to make the 8" blocks.
Monday night, I finished quilting a child's quilt for a Syrian Refugee family. My friend, Jacqui, is putting the binding on this quilt. I made the quilt top a few years ago at a workshop and found it in my sewing room recently and decided to finish it off as a donation quilt. Here, you can see my organic quilting:
Here is the entire quilt (well...almost the entire quilt!), after trimming.
I hope to work on my liberated baskets quilt next week.
Subscribe to:
Posts (Atom)