Sunday, November 26, 2017

Quilt 'til You Wilt

Yesterday was our annual Quilt 'til You Wilt day with the London Friendship Quilters Guild.  I packed up my sewing machine, supplies and projects on Friday night and my husband helped me to load the car at 8am on Saturday morning.  I was among the first to arrive and got a table for four near the ironing station. By the time I set up my machine, Cathy arrived, coffee in hand. A little while later, Christine and Karen showed up. We all had a great day, chatting and sewing and admiring all of the sewing going on in the room.


Christine finished up the last few blocks for a quilt she is making for her daughter and by the end of the day, the quilt top was finished, except for the final border! She used her 1951 featherweight.


Karen stayed up late the night before pin basting a pile of table runners that she had pieced and spent the day quilting them and adding binding. I see lots of hand stitching in her near future!


Cathy was working on an I Spy quilt for her grand-daughter and had the entire middle of the quilt done by the time she went home late afternoon.  She will add the borders and get it quilted in the next week or so.

I worked on a comfort quilt block for the Elgin Piecemakers to get me warmed up. February's colours are lime green and yellow with white--I needed to make a star block.  I found this pattern on the internet.  There was some math involved as the pattern was for a 6.5" block and my block is 12.5"


Next, I worked on a project I have been wanting to do for years...A new Christmas tree skirt.  My old one is over 30 years old and looks like it was made in the 80's, which it was.  I saw some pictures on the internet of a tree skirt made with 60 degree 8" triangles that I liked.  Most of the fabrics that I had been collecting for this project were fat quarters so I decided I would use 4" triangles instead.  What I did not realize at the time was I would need 360 triangles to make my skirt.  I spent one evening cutting triangles this past week when Christine was over to sew.


I used my table to lay out all of the triangles for each section before I started to sew.


You can see the piles of triangles for each section at the top of the picture above.  I divided up all of the fabrics evenly so the whole thing will look balanced in the end.

Here is the first section, all sewn together.  The skirt will be a large hexagon and the long side on the right being the outer edge.  The narrow part on the left will be near the tree.  I am making a large hole in the middle to accommodate the tree stand.

Here are sections 1 and 2, sewn together.

By the end of the day, I had three sections done. --Half of the tree skirt.


I will work away on sewing more sections this week as time allows.  I would like to have it done by two weeks from now when we put up our tree.  I will be using the same red and white striped binding as I used on my Christmas quilt.


Just before I went home for the day, I made three string blocks for January's comfort quilt for the Elgin Piecemakers.  This fabric was donated to our guild and two of our members cut it into strips and gave us muslin foundations to use.  The only instructions were to put the yellow strip down the middle diagonally for each block.

Today, it is time to slow down and do some counted cross stitch with the other Slow Sunday Stitchers at Kathy's blog.    I am adding outline stitches to this snowman's hat and scarf today and would like to  finish him off including the birds and sticks as well.


Friday, November 24, 2017

Zippered Pouch


I made this zippered pouch from a tutorial I found at Noodle-Head for a friend who helped me out with a problem.  I'm not going to talk about the problem, other than to say that, with her help, the solution was sorted out and there was no longer a problem!  I am very grateful for her assistance at a time when I was feeling powerless.


The two fabrics on the outside of the pouch were part of the same line of fabric and have been in my stash for a couple of years.  The lining fabric was in my dotty fabrics drawer and it had all the same colours in it and it was purchased at a different time and place from the other fabrics!

The turquoise zipper was a perfect match.


I quilted this little pouch with green thread in straight lines with my DSM.  I used some batting scraps  to give the pouch some body, rather than the interfacing suggested in the tutorial.

The Elgin Piecemaker's Guild met last night and we brought our grey, black and turquoise blocks in for this month's comfort quilt for an adult chemo patient at our local hospital.   I think this will be a stunning quilt!  Sashing and borders will be added by two members of the guild and then it will be given to another member for long arm quilting--this is a true group project!


Sunday, November 19, 2017

My Thread Stash and a Finish

Back in August, I took a two day design workshop with Jacquie Gering.  You can read my blogpost about the workshop here. 

If you went back to the post, you would have read that I had the quilt pin basted shortly after the workshop--I just needed to find the right colour of thread.  I had lots of colours in my thread stash, but not the right colour. (Here is a picture of my thread drawer--the colour I used in the quilt is in the picture.)


Jacquie had suggested a lighter colour of thread for the quilting of this project and I did not have any suitable colours in my thread drawer.  Every time I was in a sewing store, I checked to see if they had Aurifil thread and if they did, I searched for a light colour that would work for my quilt.  Finally, I found this light peach colour.  This was one of the colours that Jacquie had suggested. 


I have saved my empty spooks in a basket in my sewing room for several years.  You can see that I have gone used lots of thread since I started sawing the spools.  Each orange spool represents a kilometre of thread--half a kilometre of sewing if you consider that half the thread gets used in the bobbin. 


Now, back to my quilt...

I used a quilting idea from Jacquie's book "Walk".  If you don't already have this wonderful book, go out and buy it or drop subtle hints to Santa...  I used my Hera marker to draw two gently curved lines diagonally across my quilt, intersecting them in the centre. Then, I echo quilted each quadrant, using the edge of my presser foot as my guide. 


The lines of quilting are 3/8" apart  and by the time I finished all of the quilting, the quilt would not lay flat.  Jacquie had told us about how she blocks her quilts by spraying them with water and stretching them out to flatten them after quilting and before trimming and binding.  I decided to give this a try, but first I had to buy a clean spray bottle.  This took a while because I kept forgetting to look for a bottle when I was at a hardware store.  Finally, my husband picked one up for me when he was out one day.  I sprayed my quilt, stretched it out and pinned it to the carpet in my family room.  I sprayed it one more time and left it to dry overnight.  In the morning, it was flat!!!  I trimmed it and made binding with some navy fabric leftover from making the quilt.


This week, I sewing the binding on first by machine and then finished it off by hand last night.


I had this bicycle print in my stash and since the front of the quilt spins, I thought it was appropriate.


Here is a close up of the quilting.


And... here is the finished quilt:


When I first made the label, I called this quilt "clockwise"...then, I realized that it if actually spinning counter clockwise, so I had to change the label to reflect this name change.

I will be linking up with Kathy and the other slow stitchers.  Go and take a look at what everyone is up to. I hope to have some more hand stitching time later today.

Saturday, November 11, 2017

Placemats and More Counted Cross Stitch

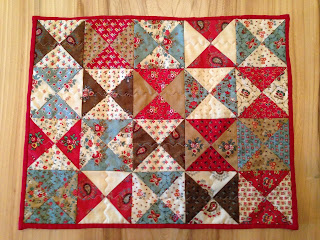
The London Friendship Quilters Guild met this week.  Every year at this time, each member of the guild makes placemats to donate to Meals on Wheels.  The placemats are given to shut ins along with their Christmas dinner which is delivered on Christmas Day. A representative from Meals on Wheels attends our December meeting to receive the placemats.  The people who receive them each year are very grateful and pleased to have a homemade gift along with their meal.  This week, I made two placemats to donate.   I found a charm pack in my stash and used the squares to make hour glass units.


I ran out of the lighter squares so the second placemat has some solid squares in it.


I quilted both placemats on my DSM and used some solids from my stash for the binding.


On the backs, I used some Christmas fabrics, also from my stash.


Here is a close up of the quilting on one of the placemats.


Here are both placemats:


I also worked on my Counted Cross Stitch snowman picture, adding some more snow and outlining.


There is still lots more outlining to do, but progress is being made.


I hope to do some more outlining tomorrow, during slow Sunday stitching time with Kathy.

Friday, November 3, 2017

Christmas Quilt Finish

This week has involved a lot of waiting.  While I was waiting, I kept my hands busy by hand sewing the binding on my Christmas quilt.  This was a sew along with Lorna at Sew Fresh Quilts.


I love this stage of making a quilt.


The red and white striped binding is just what I wanted!


The quilting is a pantograph called "Frost".


The background is Essex linen.


The sun shone long enough this morning for a photoshoot outside!

I will be linking up to Finish it up Friday and Slow Sunday stitching with Kathy.