We started by talking about straight line quilting. My sewing machine walking foot is 3/8" from needle to the edge of the foot. Other walking feet were 1/2". Jacquie explained how to keep the lines straight by adding painters tape to our projects and using a ruler to measure how far to the tape at the top, middle and bottom of the project.
These lines were 3/8" apart. I then subdivided them...
And then again... (but I did not take a picture!) This is called matchstick quilting and can add wonderful texture to a project. Jacquie showed us her notebook cover below as a great example of matchstick quilting. A friend made this cover for her.
Next, we did some gently curved lines. I used a hera marker to make the first line and then used the edge of my walking foot to sew each line.
We had time after each lesson to try out each type of quilting pattern.
Since everyone was getting quite comfortable with curves, we did some organic quilting next. I have done lots of this type of quilting in the past. Jacquie encouraged us to let some of the lines cross to make them look like ribbons. The possibilities are endless!
Spiral quilting was up next...I had already done this on a quilt I showed in my last post, so I spent my practice time learning how to spiral into the centre of the circle. I made two attempts at this and the second was much better than the first...I think I need to practice more before doing this on a real quilt. Again, no pictures...sorry.
Jacquie showed us a sample "book" she made of all of the fancy stitches on her sewing machine, sewn at different stitch lengths and widths. She has a notebook with all the information about each stitch and uses her sample stitches to pick quilting stitches for her quilts. These stitches can add wonderful texture to a project.
I used one of my quilt sandwiches to try out some stitches on my machine. I have actually quilted a table topper with fancy stitches before.
I labelled my stitches right on my sample.
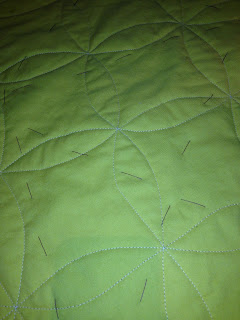
This is called Orange Peel quilting--we had to draw a grid on our fabric and then sew curved lines between the intersections. Jacquie showed us lots of examples of all of the quilting stitches on her own quilts as well as lots of variations for each of the stitches.
I would like to bottle some of Jacquie's energy and ideas! It was a wonderful two days and I can't wait to try out some of the ideas we discussed and practiced on my own quilts!
Thanks, Jacquie!!!


Looks like an terrific workshop! Love the stitch sample book - I did that when I got a new sewing machine - amazing how different the stitches look, stitched out, from the wee little graphic on the sewing machine.
ReplyDeleteWow, all of your class samples are beautiful! Looks like you have a wonderful time and learned a lot!
ReplyDelete